
Table of Contents
Project Overview: University Acoustic Panels at USF
- Project: Wall-to-Wall Acoustic Panel Treatment for a New Laboratory and Education Center
- Location: University of South Florida Main Campus, Tampa, FL
- Facility Type: University Lab and Education Space with Hard Reflective Flooring
- Client: University of South Florida
- Objective: Reduce Reverberation from 1.8 Seconds toward ANSI S12.60 Compliance
- Scope: Wall-to-Wall Acoustic Panels, Impaling Clip Mount, ~20 ft Wall Span Coverage
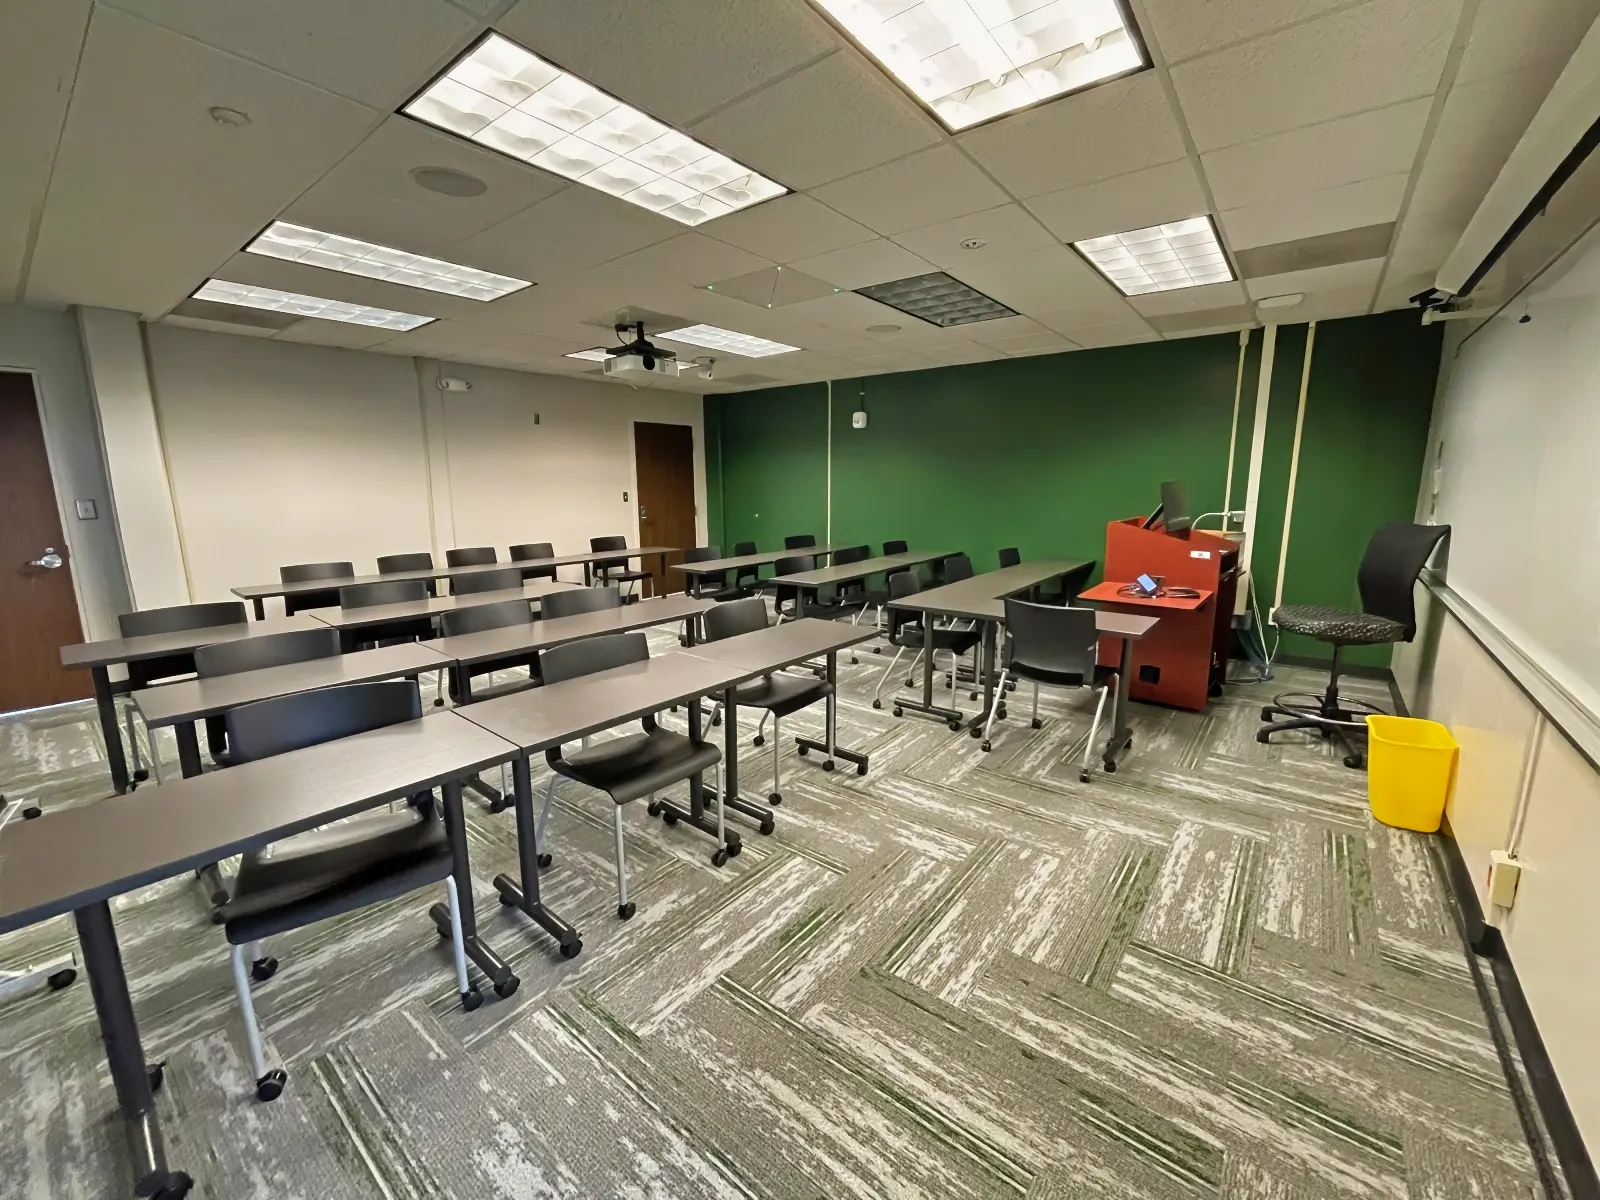
The University of South Florida built out a new laboratory and education center on its main campus and brought Commercial Acoustics in to handle the room acoustic treatment. The space was finished with a hard reflective floor and a suspended acoustic ceiling tile grid, and the architect specified wall-to-wall acoustic panels to bring reverberation down into the working range for instruction and lab activity.
The fabric wall system is generally our preferred method for treating an entire wall area in education spaces, especially when there are wall penetrations to plan around. Contractual and schedule constraints on this project pushed the design toward edge-to-edge acoustic panels instead, which the team installed with impaling clips for a clean permanent mount.

Acoustic Challenges in University Lab and Classroom Spaces
- Measured Baseline: 1.8 second RT60, well above the ANSI S12.60 compliance window
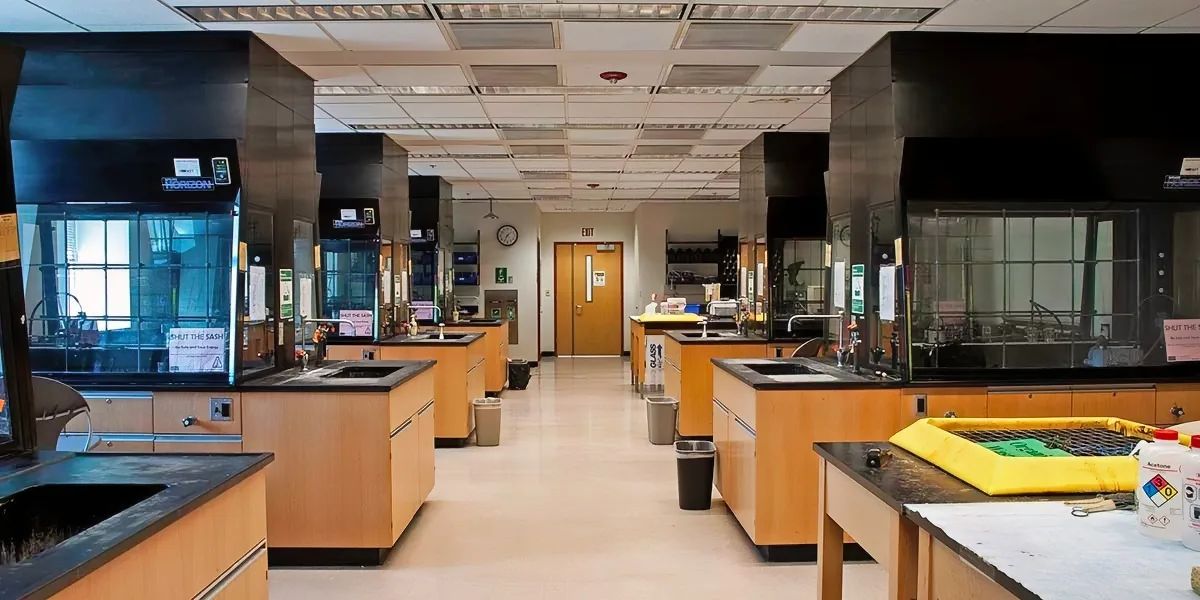
- Hard Reflective Finishes: Polished floor, drywall walls, large open volume
- Existing Ceiling Tile: Acoustic tile grid with NRC above 0.5 (helpful but not sufficient)
- Schedule Constraint: Punch list and contractual timeline ruled out a fabric wall buildout
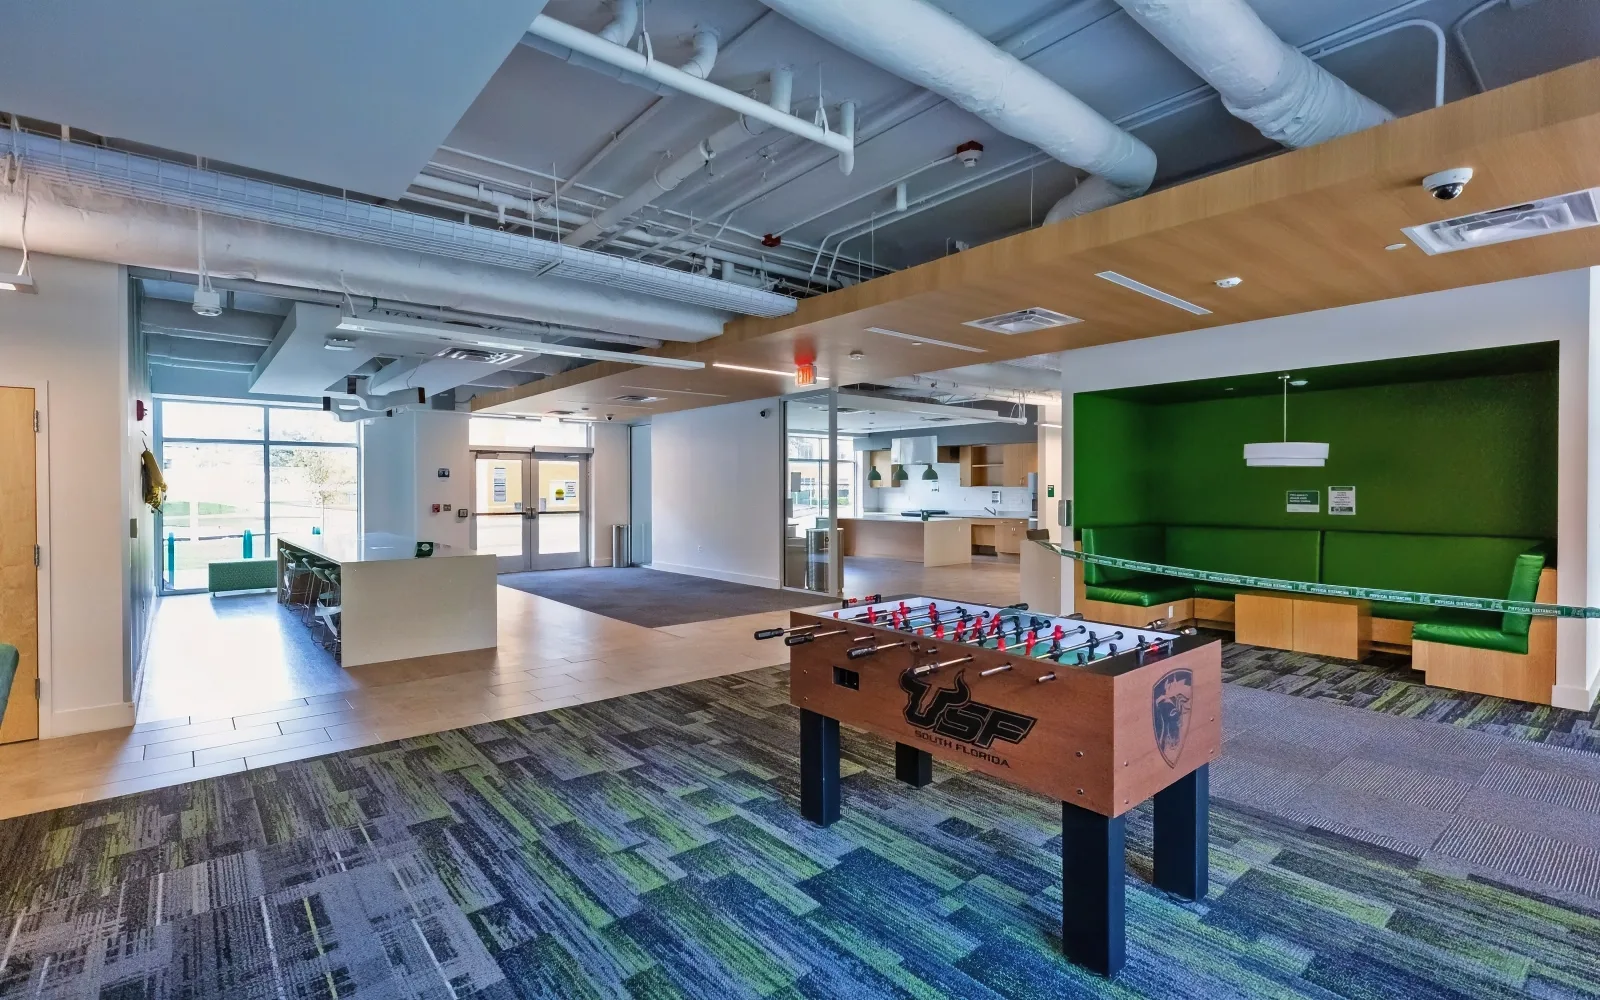
University labs and education centers are some of the harder rooms to tune. Volumes get large, finishes default to hard for cleanability, and the room has to support both quiet seated work and amplified instruction in the same envelope. Without dedicated absorption, RT60 typically sits well over 1.5 seconds and speech intelligibility falls apart at the back of the room.
The existing ceiling tile carried an NRC above 0.5, which helped the high-frequency band but did not bring broadband RT60 anywhere close to the ANSI S12.60 ceiling. Wall coverage was the lever the architect had left to pull. Our room acoustics calculator handles this exact Sabine math.
Solution: Wall-to-Wall Acoustic Panels with Impaling Clip Mounting
- Material: Edge-to-edge acoustic absorption panels, full wall span
- Mounting: Impaling clips for a permanent flush mount
- Coverage: 4 inches off the ground up to the acoustic ceiling tile grid
- Wall Span: ~20 ft, full wall coverage on the treated side
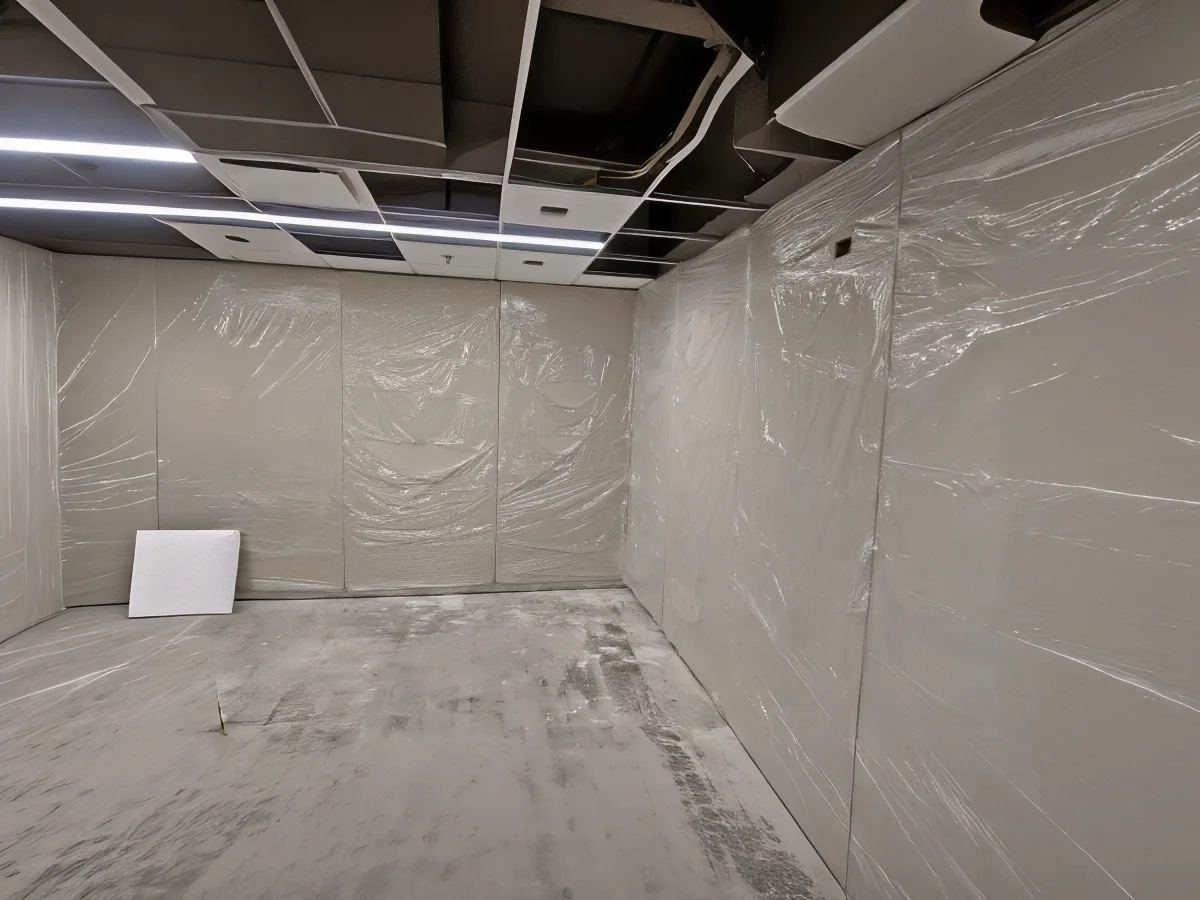
Panels were specified large enough to span from 4 inches off the floor up to the underside of the ceiling tile grid in single-piece runs. That kept the visible joint count low and gave the wall a clean architectural finish, which is a real concern in a brand-new education space where the room is also part of the recruiting tour. Detail on the panel family used here lives on our acoustic absorption panel page.
Installation kept the protective plastic covering on the panel face during the contractor punch list. That sounds minor; it is the difference between delivering a wall full of panels with crisp fabric edges and delivering a wall full of panels with marker scuffs. The plastic came off after final walkthrough.
Impaling clips fasten through the back of the panel and bite the wall behind the fabric face. They hold the panel permanently without through-fastening or visible hardware on the front. For a sibling university project where the team treated a ceiling rather than a wall, see our USFSP library case study.

Results: RT60 Cut by 0.8 to 1.0 Seconds
- Pre-Treatment RT60: 1.8 seconds
- Post-Treatment Reduction: 0.8 to 1.0 seconds, into the ANSI working range
- Mounting: Edge-to-edge, impaling clip, no visible hardware
- Finish: Plastic covering preserved through punch list, removed at final walkthrough
The estimated reverberation time of the treated space dropped by 0.8 to 1.0 seconds against the 1.8 second baseline. That is the difference between a room where instruction has to compete with the room itself and a room where the room actively supports speech. For depth on how absorption coefficient is measured and why thicker panels swing this number more than thin ones, see our sound absorption coefficient guide.
CAC vs NRC for University Ceiling Tile Selection
Two different numbers describe acoustic ceiling tile performance, and they describe different jobs. NRC measures how much sound the tile absorbs from the room. CAC, or Ceiling Attenuation Class, measures how well the tile blocks sound traveling through the plenum to the next room. They are not interchangeable.
- NRC: Fraction of sound absorbed into the panel, scale 0.00 to 1.00
- CAC: Sound transmission loss between adjacent rooms via the plenum, scale typically 25 to 40+
- For Reverberation: Use NRC. Higher NRC pulls more energy out of the room.
- For Speech Privacy Between Rooms: Use CAC. Higher CAC blocks more sound transmission.
University spec writers sometimes treat the two numbers as one budget and lose either reverberation control or speech privacy as a result. The right approach is to specify both: NRC at or above 0.70 for the room itself, CAC at or above 35 if the rooms above the plenum need to stay quiet relative to one another. The USF lab tile carried an NRC above 0.5 on the room side, which is why we still needed wall coverage to hit the broadband RT60 target.

ANSI S12.60 and LEED v4 Acoustic Standards for Education
ANSI S12.60 sets the room-side requirements for education spaces. RT60 must stay at or below 0.6 seconds for a furnished, unoccupied classroom under 10,000 cubic feet, and at or below 0.7 seconds for spaces between 10,000 and 20,000 cubic feet. Background noise has to stay below 35 dBA.
LEED v4 BD+C: Schools makes ANSI S12.60 compliance a credit pathway. Achieving the credit usually requires 70 to 90 percent ceiling coverage with NRC 0.70+ tile, plus enough wall absorption to close the gap on broadband reverberation. The USF lab project leaned on the wall side because the ceiling alone was carrying NRC just over 0.5.
For larger university lecture halls outside the 20,000 cubic foot ANSI cutoff, the same broad principles apply with looser specific targets. Volume per seat, RT60, and background noise are still the three numbers worth pinning down before specifying any treatment.
Conclusion: Acoustic Treatment for University Labs and Classrooms
University acoustic projects come down to four levers: ceiling tile selection, wall absorption, room volume, and HVAC noise control. Get all four right and the room hits ANSI S12.60 without any drama. The checklist below is what we recommend for any new lab or education space heading toward an ANSI or LEED compliance pathway.
- Specify NRC and CAC Separately: NRC 0.70+ for room-side reverberation, CAC 35+ for plenum sound privacy. Don’t treat them as one budget.
- Plan Wall Absorption Early: Ceiling tile alone almost never gets a hard-floor lab inside the ANSI S12.60 RT60 ceiling.
- Use 2 Inch Panels: 1 inch panels lose absorption coefficient below 250 Hz and distort the broadband RT60 reading.
- Mount with Impaling Clips: Permanent, flush, no visible hardware. Right tool for an education space that has to look architectural.
- Keep the Plastic On: Leave panel face protection in place through the contractor punch list. Remove at final walkthrough.
Commercial Acoustics provides acoustic design, panel manufacturing, and installation for university labs, lecture halls, classrooms, and shared learning spaces nationwide. Engagements typically start with a measured RT60 baseline and a target tied to ANSI S12.60 or LEED v4 BD+C: Schools.
FAQs: University Acoustics
What RT60 is required for a university classroom?
ANSI S12.60 sets the cap at 0.6 seconds for furnished unoccupied classrooms under 10,000 cubic feet and 0.7 seconds for rooms between 10,000 and 20,000 cubic feet. Background noise has to stay under 35 dBA. Lecture halls beyond 20,000 cubic feet follow the same principles with looser specific targets.
What is the difference between NRC and CAC?
NRC measures how much sound a ceiling tile absorbs into itself, on a 0.00 to 1.00 scale. CAC measures how much sound the tile blocks from passing through the plenum to the next room, typically 25 to 40 plus. Use NRC for reverberation control, CAC for speech privacy between rooms.
How thick should acoustic panels be in a university space?
2 inch panels are the right default. They hold absorption coefficient down through the lower octaves where amplified speech and background HVAC live. 1 inch panels lose performance below 250 Hz and distort the broadband RT60 reading. Use 2 inch unless wall depth is genuinely constrained.
Why was a fabric wall not used at USF?
Fabric wall systems are usually the preferred treatment for full wall coverage in education spaces, especially with multiple wall penetrations. The contractual schedule and punch list timeline on this project ruled out a fabric wall buildout, so wall-to-wall acoustic panels with impaling clip mounting handled the same coverage on a faster install.

Walker Peek|Founder & CEO, Commercial Acoustics
Walker founded Commercial Acoustics in 2013 to bring aerospace-grade engineering discipline to soundproofing, and runs the firm as CEO from its 12,000 sq ft Tampa production facility. The company designs custom acoustic panels, sound membranes, and masking systems for multi-family, hospitality, healthcare, and commercial projects across the US — built around Walker’s invention, Wall Blokker, an EVA-based sound barrier that hits STC 50-plus at roughly $1 per square foot installed.
A Jacksonville native, Walker spent five years at Kennedy Space Center with Craig Technologies before founding Commercial Acoustics — certifying aerospace manufacturing to the AS9100 standard and leading Six Sigma Black Belt process-improvement teams on NASA programs. He is a certified Industrial Noise Control Engineer and the author of Architectural Acoustics: A Practical Handbook.