Table of Contents
Project Overview: LVT Soundproofing Underlayment
- Project: LVT Soundproofing Underlayment for a Multi-Family Development in Wisconsin
- Client: Little Creek Construction (Wisconsin general contractor)
- Facility Type: New-Construction Multi-Family Apartment Building
- Flooring: Luxury Vinyl Plank (LVT) With Sufficient Wear Layer and Base Layer for Floating Install
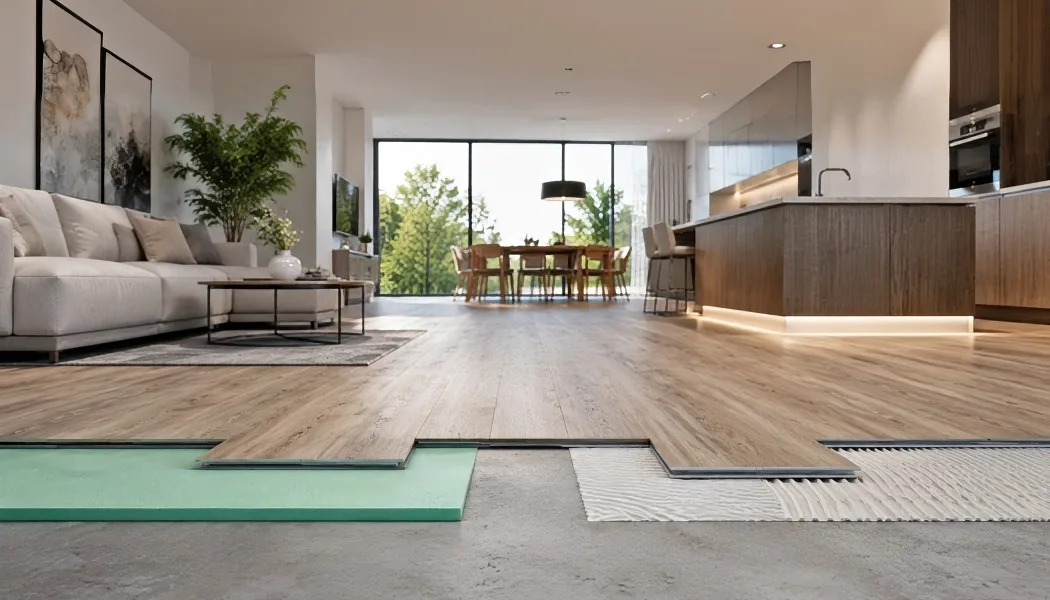
- Underlayment: Floor Blokker Acoustic Membrane, Floating Application
- Outcome: Maximum-Performance Install Method for the LVT Assembly, Both Subfloor Types Lab-Tested
Why LVT Installations Are Acoustically Sensitive
Luxury vinyl plank is now the dominant finished floor in mid-market multi-family construction. It looks like wood, costs less than wood, and tolerates moisture better than wood. Acoustically it behaves nothing like wood. LVT is a thin hard surface that transmits impact noise efficiently and reflects airborne noise back into the room.
The underlayment underneath the LVT is the entire acoustic system. The plank itself contributes almost nothing to impact insulation. Whatever IIC and STC rating the floor assembly hits is determined by which underlayment is specified and how it is installed beneath the LVT. Get the underlayment right and the floor performs. Get the install method wrong and the rated underlayment underperforms regardless of brand.
The Wisconsin multi-family project ran into the second issue head-on. Little Creek Construction had used Floor Blokker before and trusted the product. The question was which install method to use under the LVT for maximum acoustic performance. The deeper background on what IIC actually measures lives in our IIC rating explained guide.

The Three LVT Underlayment Install Methods
- Floating: Neither the underlayment nor the LVT is adhered to anything below it
- Single-Glue: The underlayment is adhered to the subfloor, the LVT floats on top
- Double-Glue: Both the underlayment and the LVT are adhered down
- Adhesive: Pressure-Sensitive Adhesive applied with sufficient contact, never over-applied
The three install methods differ in how the LVT and the underlayment couple to the subfloor below. Each layer of adhesive that bonds something to something else creates a transmission path. More transmission paths means more impact and airborne energy moves through the assembly into the unit below.
The Wisconsin project used the floating method. Neither the Floor Blokker nor the LVT was glued or nailed to the subfloor. The full weight of the floor assembly held the layers together while the absence of adhesive bonds preserved the underlayment’s rated transmission loss.
The product page with full spec data and lab-tested IIC and STC ratings on concrete and wood subfloors lives at the Floor Blokker acoustic underlayment page.

Why Floating Outperforms Glue-Down
Adhesive is structural. It bonds two surfaces into a single coupled assembly. That is exactly what an acoustic system does not want. The whole point of a sound-isolating underlayment is to decouple the finished floor from the subfloor so impact energy gets absorbed by the underlayment rather than transmitted through it.
Each pass of pressure-sensitive adhesive turns a decoupling layer into a coupled layer. Single-glue (underlayment glued to subfloor, LVT floating on top) loses some performance. Double-glue (both layers adhered) loses more. Floating preserves the full rated performance because both interfaces remain decoupled.
Nailing is worse than gluing. A nailed hardwood floor punches dozens of rigid mechanical bridges through the underlayment per square foot. Each one becomes a transmission path. The nailed assembly tests several IIC points lower than the same materials installed floating. That is why hardwood-over-underlayment generally underperforms LVT-over-underlayment in multi-family vertical assemblies.

When Floating Isn’t an Option
- Thin LVT: Wear and base layer too thin for an unsupported install
- Subfloor Flatness: Variations beyond LVT manufacturer tolerance
- Manufacturer Requirement: Some LVT lines mandate full-spread adhesive for warranty
- Heavy Rolling Loads: Specific commercial-grade contexts (e.g. healthcare, retail equipment)
Floating is the highest-performance method but it is not always available. Thinner LVT product lines lack the wear and base layer thickness to stay flat without an adhesive bond, which can result in lifting or curling along the seam edges over time. Subfloors that fall outside the LVT manufacturer’s flatness spec can also force a glue-down install regardless of acoustic preference.
When floating is off the table, single-glue beats double-glue for acoustic performance. Adhering only the underlayment to the subfloor keeps the LVT-to-underlayment interface decoupled. That preserves more of the underlayment’s rated impact insulation than locking everything down with adhesive on both interfaces.
For a sister project that ran a between-floor underlayment retrofit on a high-end multi-family vertical instead of a new-construction LVT install, see the multi-family soundproofing underlayment case study.

LVT Underlayment Performance by Install Method
Lab-tested IIC and STC ratings shift with the install method holding everything else constant. The same Floor Blokker underlayment delivers different field performance depending on how it is bonded to the subfloor and to the LVT above. The table below maps the typical performance bands for each method on a wood-truss multi-family assembly.
| Install Method | IIC Range | STC Range | When to Use |
|---|---|---|---|
| Floating (Wisconsin Project) | 57 to 60+ | 62+ | Thick LVT, flat subfloor, manufacturer permits floating |
| Single-Glue (Underlayment Adhered, LVT Floating) | 55 to 58 | 60 to 62 | Subfloor flatness issues, mid-thickness LVT |
| Double-Glue (Both Layers Adhered) | 53 to 56 | 60 to 62 | Manufacturer mandate, commercial rolling loads |
| Nailed Hardwood (Reference) | 50 to 54 | 58 to 60 | Hardwood projects only, lowest acoustic performance |
The Wisconsin multi-family install landed in the top row at the floating-method performance band. Lab-tested IIC and STC values were available from the Floor Blokker spec sheet for both the concrete and wood-truss subfloor cases that show up across most multi-family stacks.

Conclusion: LVT Soundproofing Underlayment
The acoustic performance of an LVT floor in multi-family construction is not the underlayment alone. It is the underlayment plus the install method. Floating outperforms single-glue. Single-glue outperforms double-glue. The Wisconsin multi-family project used the floating Floor Blokker assembly to deliver the highest-performance band the product can hit. Contact Us for an underlayment install method review on a specific multi-family build.
FAQs: LVT Soundproofing Underlayment
What is the best install method for LVT soundproofing underlayment?
Floating delivers the highest acoustic performance because neither the underlayment nor the LVT is adhered to anything below it. Single-glue is the next-best option when floating is not allowed. Double-glue performs worst of the three glue-based methods because both interfaces are coupled.
Why does adhesive reduce underlayment performance?
Adhesive bonds two surfaces into a coupled assembly. Sound-isolating underlayment works by decoupling the finished floor from the subfloor. Each layer of adhesive turns a decoupling layer into a coupled layer, which lets impact and airborne energy move through the assembly more efficiently.
When can’t you float LVT over an underlayment?
When the LVT wear and base layer is too thin to stay flat without an adhesive bond, when the subfloor falls outside manufacturer flatness tolerance, or when the LVT brand requires a full-spread adhesive for warranty. Some commercial rolling-load contexts also force glue-down.
How does nailed hardwood compare to floating LVT acoustically?
Nailed hardwood underperforms floating LVT by several IIC points because each nail is a rigid mechanical bridge through the underlayment. Floating LVT preserves the underlayment’s decoupling. Nailed hardwood punches dozens of transmission paths through it per square foot.

Walker Peek|Founder & CEO, Commercial Acoustics
Walker founded Commercial Acoustics in 2013 to bring aerospace-grade engineering discipline to soundproofing, and runs the firm as CEO from its 12,000 sq ft Tampa production facility. The company designs custom acoustic panels, sound membranes, and masking systems for multi-family, hospitality, healthcare, and commercial projects across the US — built around Walker’s invention, Wall Blokker, an EVA-based sound barrier that hits STC 50-plus at roughly $1 per square foot installed.
A Jacksonville native, Walker spent five years at Kennedy Space Center with Craig Technologies before founding Commercial Acoustics — certifying aerospace manufacturing to the AS9100 standard and leading Six Sigma Black Belt process-improvement teams on NASA programs. He is a certified Industrial Noise Control Engineer and the author of Architectural Acoustics: A Practical Handbook.