There are two complementary principles of soundproofing – flanking and workmanship.
Sound Flanking Pathways
1% Rule: “Flanking” is the process of sound bypassing the partition through its path of least resistance. The 1% rule declares that a 1% opening in a partition will allow 50% of the sound to pass through. A corollary is that a 5% opening will allow 95% of the sound to pass.
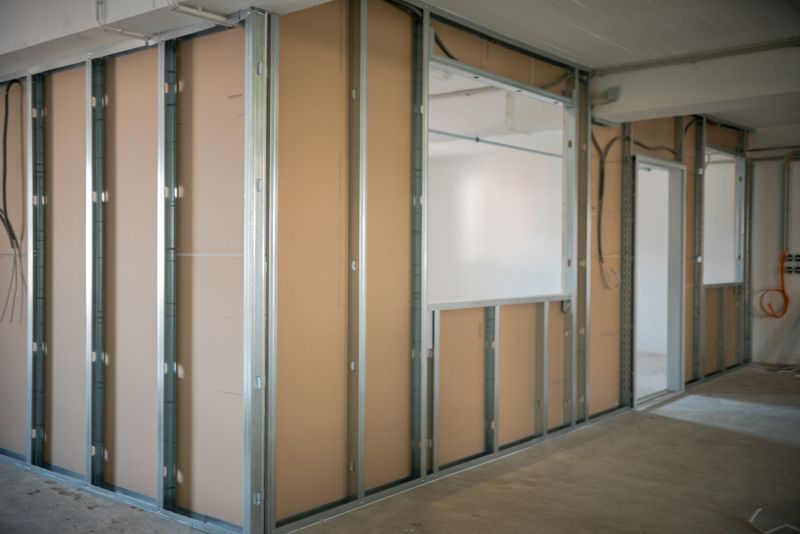
Consider an STC 60 wall (double metal stud with double layer drywall on each side, for instance). If a 10’ x 10’ wall has even a small hole cut into it, you will easily be able to hear the conversation on the other side of the wall. By leaving large gaps at baseboards or installing back-to-back outlets and other open pathways, the sound rating of an otherwise high-performing wall will be compromised.
A common example in the office space is gaps along the mullions, or walls that do not extend to deck. It is ineffective to add soundproofing capacity to a wall that has clear flanking paths around it. Doubling the drywall on a wall that does not go to deck will add 0 STC to the composite assembly.

Similarly, adding batt insulation along the top of ACT (Acoustic Ceiling Tiles) does not effectively increase the soundproofing between adjacent offices without the use of light-hoods and HVAC boots. Batting is not STC-rated, so the more effective approach is to use high-CAC (Ceiling Attenuation Class) tiles, and combine them with Light hoods and HVAC boots, or considering a sound masking approach (rather than soundproofing).
Common Flanking issues include:
- Walls that don’t extend to deck
- Back-to-back Outlets
- Doors without proper Sweeps and Seals
- Low-STC Doors and Windows
- Louvered Doors
- Low-CAC Ceiling Tiles
- Plenum Air Returns
- Light Fixtures
- Mullions
Workmanship and Soundproofing
While proper acoustic design and acoustic details may greatly improve the acoustic performance of a space, construction administration is equally critical. Similar to waterproofing mitigation by observing and reviewing laps and seals, soundproofing is only as strong as its weakest link.
Chief among workmanship defects is Resilient Channel, but a number of others also arise, such as use of acoustic caulk along base plates, properly setting adjustable door sweeps, and ensuring back-to-back outlets do not occur.
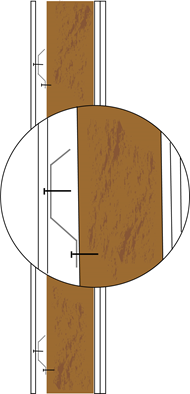
Major Issues with Resilient Channel
| Resilient Channel should NEVER be used on the same wall as Blocking. Especially when headboards, cabinets, shelves, TVs, millwork, bookcases, or other items are anchored into the wall. |
Resilient Channel often fails for two primary reasons:
- Installation Issues: Contractors commonly install resilient channel with the same installation crews as those used for framing and other processes. Whether due to speed of install or lack of familiarity, a number of installation issues arise. Some of the most common issues are:
- Spacing Between Channels: These should be consistent, and approximately 24” between adjacent rails.
- Spacing from Bottom: The bottom RC-channel should be 2”-6” from the bottom of the drywall and faced upward. The rest of the channels should face downward.
- Grounding of Channels by Screws: Screw sizes that are not deep enough to ground the drywall into the studs.
- Location of Notches/Template Holes in front of studs: The notches in the RC channel should always be directly over the stud.
- Design Issues:
- Issues arise any time that there is an object mounted onto the wall that requires fastening into the studs (if drywall anchors are NOT used). This creates a stiff condition that limits the effectiveness of Resilient Channel. This includes, but is not limited to:
- TVs, Cabinets, Shelves, Bookcases, Heavy Artwork, Mirrors, and Whiteboards, and Handrails
- More broadly, any time that Blocking is Used, the resilient channel is crushed during drywall installation, greatly reducing field-STC performance
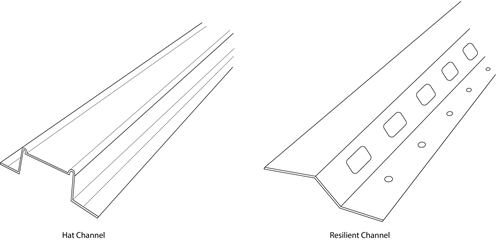
Hat Channel vs Resilient Channel
NOTE: Remember that Resilient Channel, also known as “Z Channel”, improves sound ratings by decoupling the drywall from the studs. All vibration must travel through the thin, single-flange connection that fastens the drywall to the studs. Hat Channel, or “H Channel”, is much less effective, since it provides less decoupling through stronger flanges with two connection points. Hat Channel should ONLY be used if isolation clips are used to fasten the hat channel to the studs.