Accurate Acoustic Details are a critical element to any project’s ultimate success. While great care is generally taken to specify STC-rated wall assemblies and IIC-rated flooring assemblies, the field performance is often highly dependent on details including boundary conditions, edge interfaces, and treatment of wall and floor penetrations. Architectural Acoustic Details are equally critical to prevent vibration paths for rooftop HVAC units transmission of ducted airflow and other noise generating sources. Ensure that your next design achieves ideal field results by incorporating relevant acoustic details below into your design package.
Acoustic Requirements for Penetrations
- Door sweeps and weather-stripping should be used on all doors that lead into noisy areas, such as mechanical rooms or trash compactors rooms. In order to be effective, plastic or rubber door sweeps much be used rather than a brush type. If light is coming in from around the door, weather-stripping and door sweeps may not have been installed correctly and sound flanking will occur.
- Install weather-stripping around all exterior doors and windows.
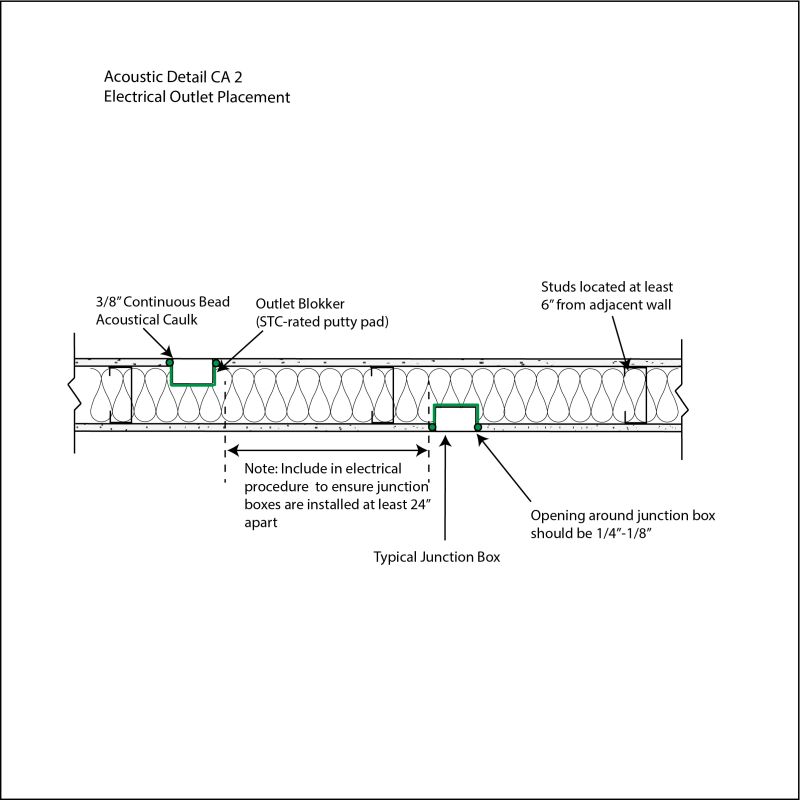
- Outlet boxes should not be installed back-to-back on partition walls, and should be installed staggered with only one per stud cavity. Junction boxes should be installed at least 24 inches apart. The opening around a junction box should be 1/8” – ¼” wide, and should be filled with 3/8” continuous bead acoustical caulk to prevent a rigid connection between the junction box and the drywall. STC-rated putty pads should be used behind all junction boxes to minimize sound flanking through the outlets.
- Gaskets should be installed on all switch and outlet faces.
- A 1/8”-1/4” gap should be cut around the perimeter of fire sprinklers and dampers. Fill the gap with 3/8” continuous bead acoustical caulk to prevent rigid connection between the sprinklers and the drywall.

Preventing Structure Borne Noise
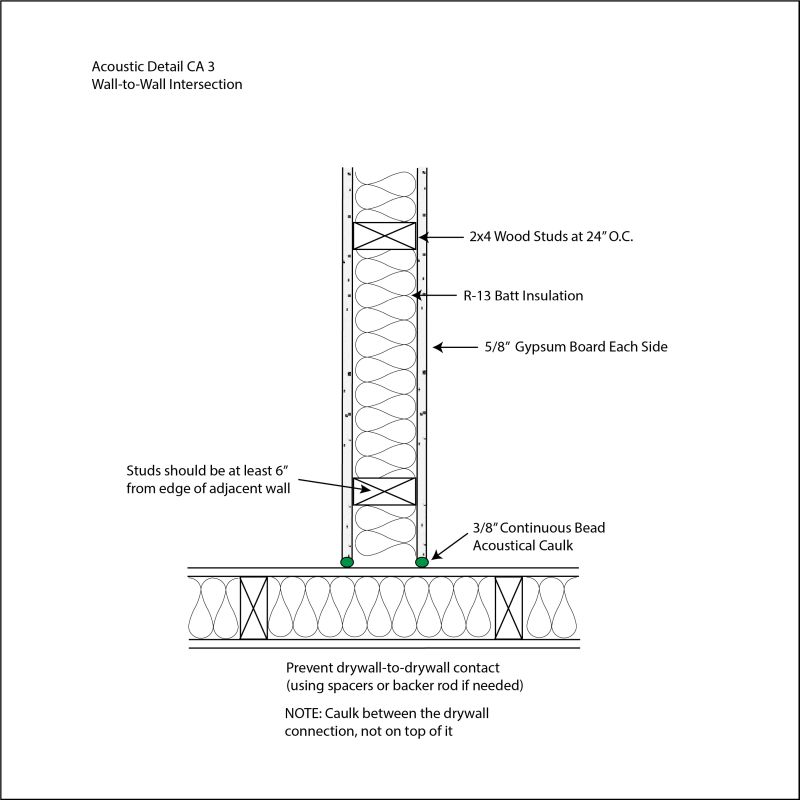
- Where the ceiling and wall intersect, prevent drywall-to-drywall contact using spacers or backer rod is needed. Caulk between the drywall connection, not on top of it, using 3/8” continuous bead acoustical caulk.
- Follow perimeter isolation instructions where required. For example, when using a sub-gypcrete underlayment, you must install perimeter isolation strips before the gypcrete is poured to prevent rigid contact between the gypcrete and the drywall. Otherwise, sound will be able to travel through the gypcrete, to the drywall, down the studs to the floor below.
- Prevent rigid connection between a rooftop AC unit and concrete slab by mounting the unit on neoprene pads.
- Ensure that resilient channel is installed correctly. Do not ground RC during installation, otherwise there will be a rigid connection between the drywall and the studs.

Preventing HVAC Noise
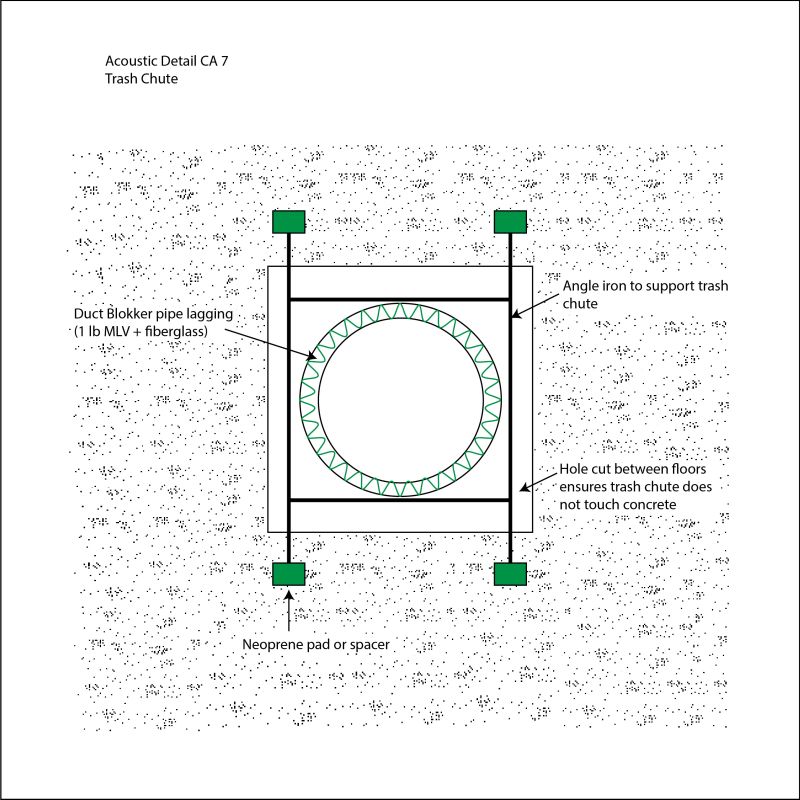
- Cover the trash chute in Duct Blokker Pipe Lagging (1 lb/sf MLV + fiberglass). Cut a hole in the concrete slab between floors to ensure the trash chute does not rigidly connect to the concrete. Neoprene pads or spacers should be used where the angle iron supports the chute on each floor.
- Keep pipes from rigidly connecting with drywall by using Duct Blokker Pipe Lagging (1 lb/sf MLV + fiberglass insulation). Also, do not route pipes near exhaust vents, route them through separate stud cavities to avoid noise form pipes traveling through ducts and into a room.

Importance of Architectural Acoustic Details
Even when acoustic details are available for a project, they’re not always strictly adhered to. To ensure compliance with details, field-based construction administration is recommended, This is especially critical for workmanship-dependent products, such as resilient channel. Consider hiring an Acoustic Consultant to perform construction admin on acoustic elements of the design.

