Commercial Acoustics has designed and constructed Home Music Studios for clients ranging from entry-level to professional quality. See our acoustic design guide below, and contact us today for a free consultation on your project
RELATED: If you need Commercial Soundproofing, see our Cinema Soundproofing projects.
Home Music Studio Soundproofing Overview
- Budget – Often times this is the most difficult item to determine when starting a Home Studio project. Consider what your goals are, and what type of results you’re expecting. There are many things you can approach in DIY fashion, but understand this will often result in sound leaks for first-time builders. As a Rule of Thumb, you should be spending at least as much on the Studio Buildout as you are on your equipment, including recording and tracking equipment and instrumentation.
- Goals – Speaking of your Studio goals, consider yours up front. Are you looking for a place to practice and do some basic recording, enjoy your music, get an initial record to the market, or develop music with professional quality?
- Primary Needs – finally prioritize what you need most, to prevent noise from disrupting neighbors and others, or acoustic treatment to minimize reverberation in your recordings. Often times, early-stage musicians are focused more on sound-blocking capabilities of their studio, while professionals are also trying to achieve high acoustical quality.
Primary Steps – Ensure Acoustic Treatment and Soundproofing Ratings
When you’re considering a home music studio, there are several factors to consider. First, how long will you be at that location? If your time-frame isn’t long enough, it may be difficult to justify the expense of setting up a true home studio. Will you be recording at night as well, or just during the day? That will affect how much effort you need to place on Sound-Blocking elements of the build-out. Do you have adjacent homes and properties that directly connect to yours? If so, structure-borne transmission will be a major issue, and this needs to be addressed at the earliest stages.
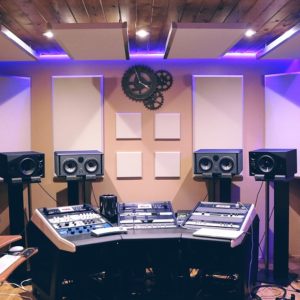
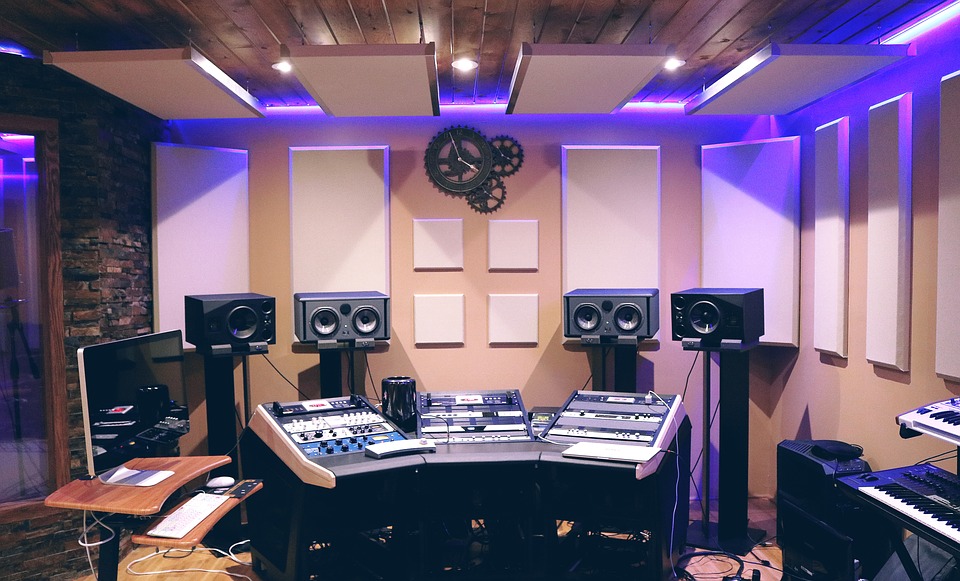
We will walk you through the step-by-step process of planning and building your home studio, along with pictures of the studio we built on a budget.
Plan Your Space
- It’s critical to have a dedicated space, so that overlapping needs for storage, recording, and engineering do not vie for limited area. If possible, you’ll want to segregate the recording and engineering areas, so that you are hearing the music purely through speakers, not through the initial instrumentation itself.
- Place the studio as close to the center of the house as possible. This is critical to prevent complaints from nearby neighbors that won’t want to hear you playing into the night.
- Determine how much space you need for instrumentation, and plan overflow space for ease of movement.
Material selection – Absorption
- Most recording artists will want a “dead” space to record in, minimizing reverb (and you can always it back in after the fact anyway). Doing this on a budget can be tricky. Moving blankets and other heavy, porous fabrics can help, but the look and sound of professional acoustic panels cannot be replaced.
- For additional absorption, consider open-cell foams on the ceiling and in the wall recesses, as well as bass traps and diffusion panels. These will help greatly at lower frequencies, and will be essential for some music genres that feature bass and drums.
- Not sure how much absorption you need? Check out our article outlining absorption elements to determine what will best fit your budget.
Material Selection – Sound Blocking Materials
- When soundproofing your studio, consider how loudly you’ll be blasting the music. If you’re keeping it in the 60-75 dB range, then standard drywall construction may be sufficient. However, anything louder, or if you have sensitive neighbors nearby, then adding sound-blocking materials into the walls is critical. This can range the Wall Blokker to the Wall Blokker Pro, or even including the DecoupLink to ensure the walls do not transmit the vibrations. For maximum sound-blocking, apply the same solution to both sides of the wall, and even consider going with staggered studs to further reduce noise transfer.
Build Your Framing
- If you can float your floor, that is ideal. Do this by using crates or 2x4s, separated from the subfloor (plywood, concrete) with carpet cushion, then apply another layer on top. Finally, install your studio carpeting. The more plush it is, the higher NRC, and therefore, absorption you will gain.
- Using 2×4’s, build out the walls of your studio. If you have existing walls, strongly consider building another wall just inside of the existing room. This is what we term a RWAR – Room Within a Room. For effective sound-blocking, there is nothing that compares.
- Add soundproofing material on each side of the framing. For minimal expense, a Wall Blokker or Mass-Loaded Vinyl is effective, and requires little installation expertise. Make sure that you have overlaps or full butt joints at each intersection. If there are gaps, measure and re-cut. Any holes remaining will cause major sound leakages when construction is complete.
- Then, use heavy drywall on each side of the frame – the thicker and heavier the better. Due to the Mass Law, the more weight you can add to the wall, the better of you’ll be.
Add Sound-Blocking Materials to Room
- Apply the sound-blocking products that you selected in step 3. This is best done immediately after framing, so that there are minimal obstructions. Tacking in the Wall Blokker can be difficult in very tight locations.
- Be sure that all materials have sufficient butt or overlap joints. Most sound leaks through small holes left during construction. Use Acoustic Caulk where possible, whenever there are small gaps.
- Consider pathways for equipment lines between the recording and tracking rooms. All cable holes should be as small as acceptable, and sealed afterward with acoustic caulk once cables are fed through.
Add Absorption Materials To Music Studio
- This should be the last step in the Studio Buildout. Heavy batting can be placed within wall cavities during sound-blocking, but heavy carpets (on the floor), acoustic panels & wedge foam (along the walls), and echo absorbing treatments (along the ceilings) should be applied liberally. 1” thickness is typically acceptable, but 2” may be required for exceptionally loud recording, or for low-frequency bass recording.
This Home Studio Design guide is intended to help the aspiring studio artist to determine the critical materials to select and criteria to consider for a new home studio.
Review our Home Studio Case Study for additional insight on past builds, and browse our Acoustic Products for more information. Call us today and get a free consultation for your project.